This FAQ guide will walk you through the step-by-step process of setting up and using UpViral with Zapier. As you may already know, Zapier works using Triggers and their corresponding Actions. You’ll need to define both the trigger and the actions that should occur when the trigger is executed.
Step 1 – Setting Up UpViral in Zapier
Before using Zapier with UpViral, you’ll need to connect your UpViral account to Zapier.
To get started:
Log in to your Zapier account at https://zapier.com/sign-up or create a new account.
From the top menu bar, navigate to Connected Accounts.
Click Connect a new account and search for UpViral.
Use your UpViral credentials to connect your account to Zapier.
Once connected, you can start creating automations. You may use a pre-made Zap or create your own using the Zap Editor. No coding knowledge is required—Zapier will guide you through the setup step by step.
Zap Components
All Zaps consist of three key components: Triggers, Actions, and Filters.
Triggers
A Trigger is an event that starts a Zap’s workflow. For example, if you want to send new leads from an UpViral campaign to a Mailchimp list, New Lead would be the Trigger.
Each Zap can have only one Trigger.
Actions
An Action is what happens after the Trigger occurs. Continuing the example above, adding a new subscriber to Mailchimp would be the Action.
A Zap can have multiple Actions, but only one Trigger. There are two types of Actions available.
Filters
Filters allow you to control when actions are performed. They let you set conditions (for example, when an email address contains “gmail.com”) so actions only run on items that meet your criteria.
If an item does not meet the filter conditions, the Zap stops and no further actions are performed.
Step 3 – Create a Zap
Once you click the “Make a Zap” button, the Zap Editor will open, where you can configure your Zap.
Note: We will show a simple example to add New Leads from your UpViral Campaign to an Autoresponder
1.The first step starts off with creating Triggers.

2. Here you will need to add your app from which you want to setup a trigger. Search and select UpViral from the list.

3. After you have selected the UpViral from the list you will need to setup its trigger. Each app has its own set of Triggers available. For UpViral this is the “New Lead” trigger.

4. If you are using UpViral for the first time on Zapier you will need to connect it before using it.

5. Click “Create a New Account” and this will open a popup window, asking you to add the API key from UpViral before you can start using it.

Follow this article on Where can I find my Upviral API key?
6. To connect Zapier to UpViral, go to your campaign and click Settings from the top menu of the UpViral dashboard. Under Advanced, select Autoresponder, then click the Connect Zapier button.
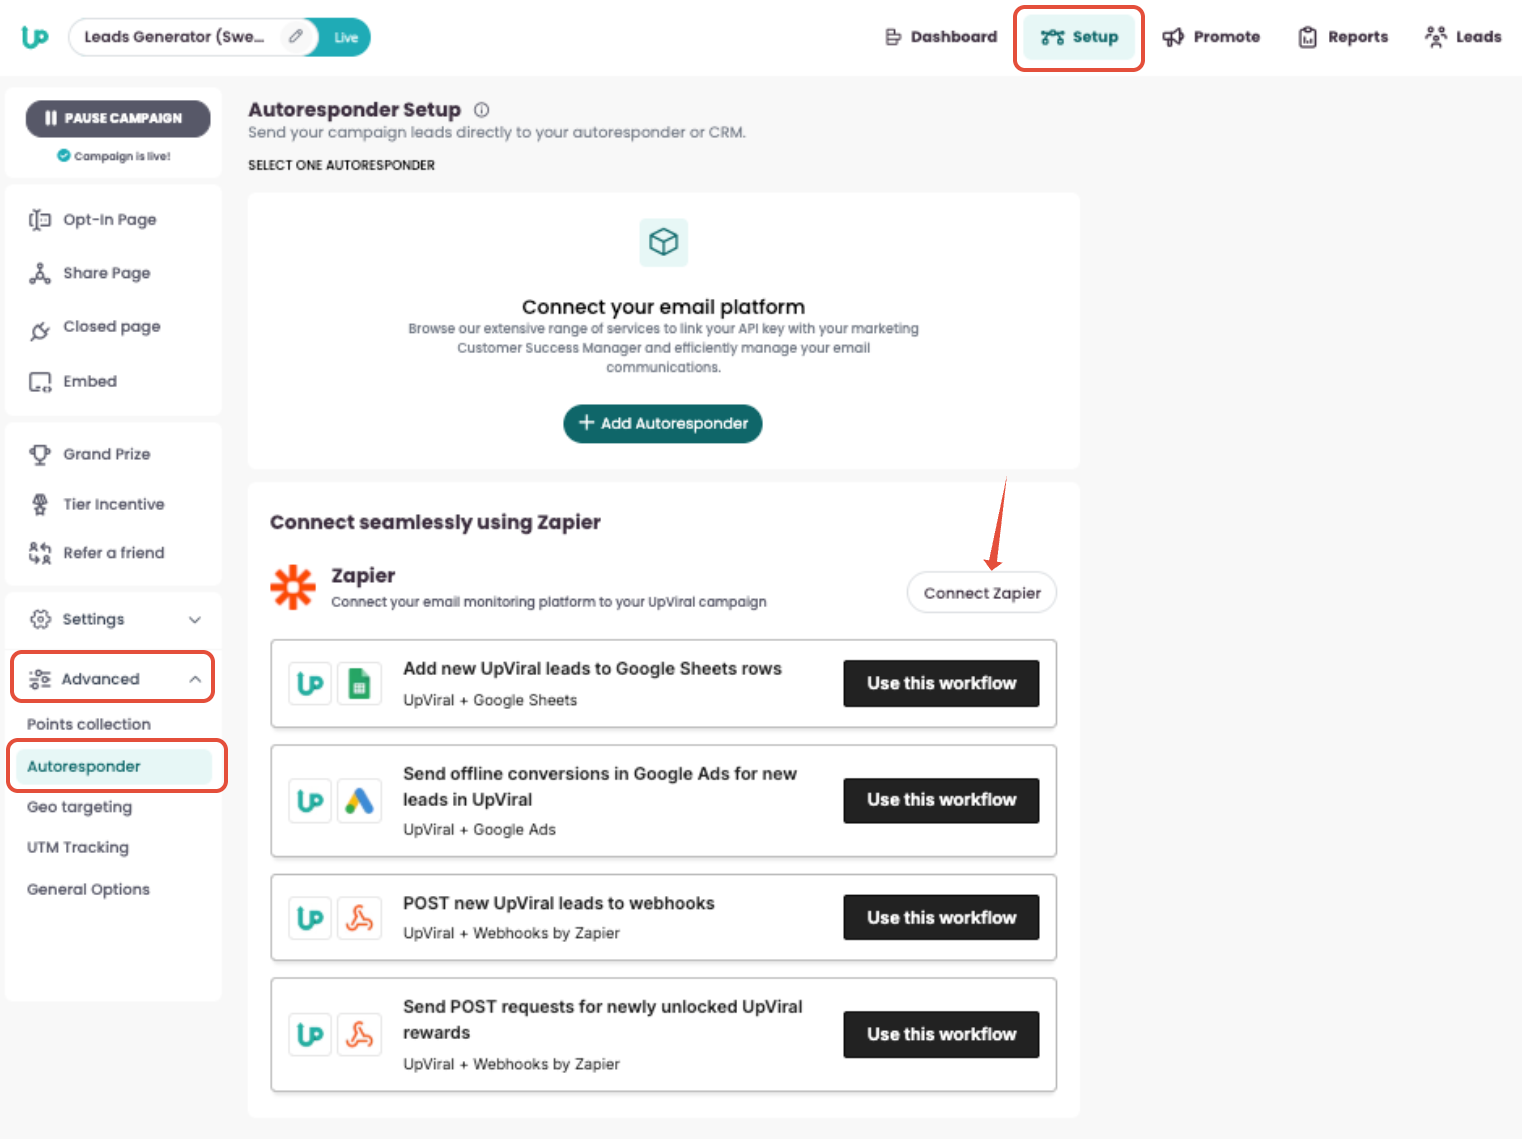
Finally, choose which Zap you would like to use.
How to get your support tickets resolved faster
Statistics have shown us that the more you tell us when you report an issue, the faster we solve that ticket. So...
1 - If you have screengrabs, please include them. A picture is worth a thousand words.
2 - If you have recorded a video showing the issue you're having, please include that as well. A video is worth a million words.
We recommend a free service called Loom for creating these videos. (this is a link to https://www.useloom.com/)
3 - To speed up ticket resolution, follow these useful tips How to Write the Perfect Support Ticket (That Gets Results Fast)