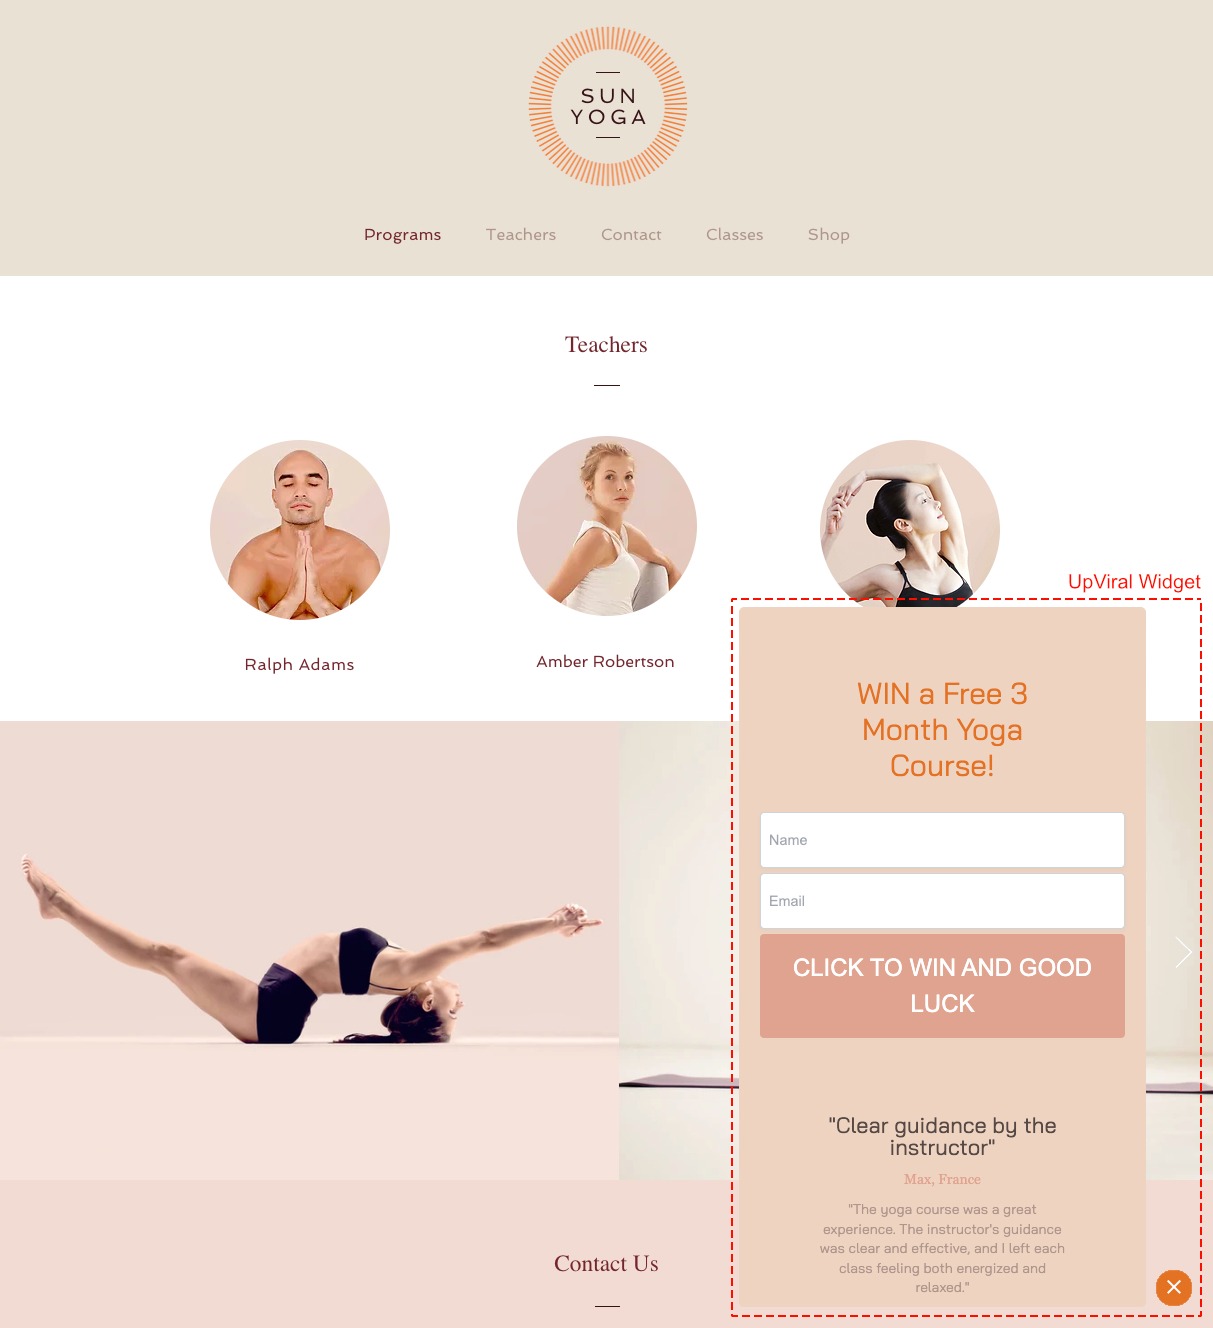
Different embedding options are available for integrating UpViral into your website. This article covers two main aspects:
Choose the embed type that best suits your requirements.
Find the right article that guides you through the process of embedding UpViral into your website.
You can use all embed types at the same time on different websites.
For a single campaign, you can utilize various embed types across multiple websites simultaneously. The websites you create within UpViral can be embedded in multiple ways across different websites. Design your campaign pages once, then use different embeddings across various platforms for diverse purposes.
This means you can direct traffic to the following simultaneously:
The version of your campaign pages hosted by UpViral.
The version of your campaign pages embedded in various ways on your own website(s).
Your own opt-in forms, which can collect leads within your UpViral campaign by integrating them with UpViral.
Step 1: UpViral opt-in form vs. your own opt-in form
You can utilize either an UpViral opt-in form or an opt-in form that is already integrated into your own website.
UpViral opt-in form:
If you opt to use an UpViral opt-in form, you'll need to design both the opt-in page and the share page using the UpViral drag & drop editor. Then you can embed these pages into your website, either in a Standard Embed, a Popup, or a Popover.
Your own opt-in form:
You can utilize an opt-in form from your homepage builder, a third-party opt-in form embedded into your website, or an opt-in form you've programmed yourself. UpViral can integrate with these opt-in forms using an embed code. Anyone who signs up via these forms will automatically be added to your UpViral campaign, just as they would if they had signed up through a regular UpViral opt-in form. You can connect external opt-in forms to UpViral via the Universal Capture or via the HTML form.
Step 2: Choose your embed type
Here you'll find descriptions of all embed types for both scenarios: whether you want to use the UpViral opt-in form or your own opt-in form. Each option includes a description, a list of pros and cons, and links to articles that explain how to use the embed type step-by-step.
In Line Embed (UpViral opt-in form) - - used to be Standard embed
Here, the UpViral campaign is displayed within a section (an iframe) of your website. You have the flexibility to determine the size and position of this section. You can either set its height and width to absolute pixel values (e.g., 600px x 400px) or define its dimensions as a percentage relative to the <div> container in which you place it.
Pros
Displays the UpViral opt-in or share page within a dedicated section on your website, ensuring it is always visible
Allows you to customize the height, width, and positioning according to your website's layout and design requirements
Cons
It takes up space on your website
May impact the layout and design of your website's content
If there are too many other things on the same website, visitors may overlook the campaign or mistake it for an advertisement
What happens after the sign-up?
You have the option to determine the action following a lead's submission of your sign-up form. You can configure the UpViral widget to either refresh and display the share widget after the submission, or redirect to another website where you've embedded the share page of your campaign as a share widget, similar to how you embedded the opt-in page.
How to install the In Line (Standard) Embed:
Popup (UpViral opt-in form)
Another option is to display your UpViral opt-in page within a popup on your website. You can choose to trigger this popup with a button click (e.g., "Find out more" or "Yes, sign me up"), or set it to open automatically upon the website loading. Additionally, you have the flexibility to delay the automatic opening of the popup.
Pros
The Popup does not affect the design or arrangement of the content on your website.
It doesn't take up space
If set to "open automatically upon page load," it becomes the most prominent solution among all embeddings, likely resulting in the highest conversions. If opened with the click of a button, its prominence and conversion rate depend on the placement of the button.
Cons
Opening the Popup with the click of a button, especially if the button is not prominent on your website, may result in low conversion rates.
Visitors who are not interested in the campaign might find an automatically opening popup annoying, as it could interrupt their intended actions on the site.
There is limited space for your UpViral campaign pages inside the Popup, potentially affecting the presentation and user experienc
What happens after the sign-up?
You can choose what happens after the lead has clicked on the submit button of your sign-up form. One option is that the UpViral widget refreshes and shows the share widget inside the same popup instead of the opt-in widget. As a second option, you can redirect the participant to a different website where you can add the share page as a Standard Embed to this website.
How to install the Popup:
Slide In (UpViral opt-in form) - used to be Popover
A Popover is like a Popup, but it opens on the side of the page without putting a dark overlay on the website. The visitor can still use the website where it is not covered by the Popover. The Popover is opened by a button, which says "Unlock Rewards" for example, and hovers above the content of your website. You can either open the Popover upon page load, with a certain delay, and/or with the click on the hovering button.
Pros
It does not affect the design or the arrangement of the content on your website. Just drop the code and you're done
It doesn't take up real estate on your website
It can be opened automatically after the page loads or after an arbitrary amount of seconds after the page loads. The movement of opening the Popover will capture the attention of the page visitor
Cons
It is less prominent than other options, so the conversion rate will be lower. The content of the website is visible and clickable while the Popover is opened. There multiple things are competing for the visitor's attention and therefore the conversion rate will be lower
There is less space for your UpViral campaign pages inside the Popover
What happens after the sign-up?
You can choose what happens after the lead has clicked on the submit button of your sign-up form. One option is that the UpViral widget refreshes and shows the share widget inside the Popover instead of the opt-in widget. As a second option, you can redirect the participant to a different website where you can add the share page as a Standard Embed to this website.
How to install the Popover:
Connect your Own Form (use your opt-in form) - used to be Universal capture
Just drop the code on your website and connect it to the UpViral installation section on the publish page. It will read out the data of your opt-in form. When the participant submits the form, the data the campaign participant enters into the form will be sent to UpViral AND to your website/server.
Pros
You don't have to design an opt-in page. You just use your own website with your own opt-in form
The sign-up data is sent to UpViral AND to your own website/server. You don't have to send the data from UpViral to your CMS or autoresponder after the sign-up of a lead. Upon submission, the lead data is sent to both locations immediately
Any embed code is able to do the job of the Universal Capture. For example, if you want to read out the opt-in form of your own website and want to add your UpViral campaign inside a popup on the same website, just embed the Popover code and it will do the job of the Universal Capture as well
Cons
If you want to use the power of the UpViral drag & drop editor, you can only use it for the share page in this case. The opt-in form has to be designed within your homepage builder or you code it yourself
Secure checkout forms, some homepage builders, or self-coded sign-up forms might not be supported by the Universal Capture
⚠️ Some forms and homepage builders are not supported ⚠️
Secure checkout forms cannot be connected. With their encryption, it is impossible to extract data from them
If you code an opt-in form yourself, please make sure it is coded according to general coding conventions to help UpViral to detect it properly
Some homepage builders and third-party opt-in forms are not supported. This is the case when the developers there don't adhere to universally accepted coding conventions
What happens after the sign-up?
In the case of the Universal Capture, you don't have multiple options here. After the sign-up, the participant will be redirected to a different website. On this website, you can embed the UpViral share widget as a Standard Embed.
How to install the Universal Capture:
in other homepage builders
Opt-in form (use your opt-in form)- used to be HTML Form
If the Universal Capture does not work in your case, you can try the HTML form. It is more difficult to set up, but it works in more cases than Universal Capture. We only recommend using it, if the Universal Capture does not work
Pros
Works in cases where the Universal Capture does not work
You don't have to design an opt-in page. You just use your own website with your own opt-in form
Cons
You need to add the same inputs in the UpViral opt-in form as you have them inside your own opt-in form
You need to find the right spot in your homepage builder to drop the HTML code. On top of that, you need to put a second JavaScript code on your website
The HTML form "steals" the data from your opt-in form. Upon sign-up, lead data is sent to UpViral ONLY. This means, if you want to have it in your autoresponder or CRM as well, you need to connect them to UpViral in order to pass the lead data on to your autoresponder or CRM
If you want to use the power of the UpViral drag & drop editor, you can only use it for the share page in this case. The opt-in form has to be designed within your homepage builder or you code it yourself
What happens after the sign-up?
You can choose what happens after the lead has clicked on the submit button of your sign-up form. One option is that the participant gets redirected to the version of your share page, which is hosted by UpViral. As a second option, you can redirect the participant to a different website where you can add the share page as a Standard Embed to this website.
How to install the HTML form:
How to get your support tickets resolved faster
Statistics have shown us that the more you tell us when you report an issue, the faster we solve that ticket. So...
1. If you have screengrabs, please include them. A picture is worth a thousand words.
2. If you have recorded a video showing the issue you're having, please include that as well. A video is worth a million words.
We recommend a free service called Loom for creating these videos. (this is a link to https://www.useloom.com/)
3. To speed up ticket resolution, follow these useful tips How to Write the Perfect Support Ticket (That Gets Results Fast)


